Thank you for your recent purchase of an Automatic Misting System. This manual will guide you through the setup, operation, and maintenance of your system.
General safety considerations
- Misting Concentrates: There are a variety of concentrated repellents and insecticides for use in Automatic misting systems. Only use concentrates labeled for use in Automatic Misting systems. Read all labels and Safety Data Sheets carefully, following all instructions regarding application, dilution rates, storage, and disposal. Some misting concentrates may be toxic to fish or burn plants. When locating nozzles, prevent mist from drifting off property. The insecticide label should be attached to the drum in a weatherproof pouch.
- Once the system has been assembled and programmed, the drum clamp ring and control box should be padlocked to prevent access by children.
- Electrical Shock Hazard: Disconnect the power source before servicing. Failure to do so could result in serious injury or death.
- The System should be in a clean, level, covered area, free from flooding and runoff, near a GFCI (ground fault circuit interrupt) protected outlet rated for 15 Amps minimum. Extension cords should not be used.
Once your shipment arrives, unpack its contents, and compare it to the packing list (Note: Additional parts are often shipped in separate boxes). Please report any discrepancies or damages within 5 days of receipt.
The System is packaged into two boxes: the Above-Drum Assembly and the In-Drum Assembly.
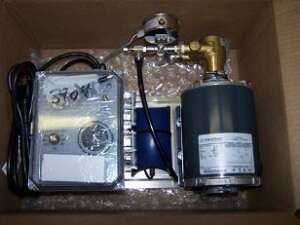
The Above-Drum Assembly consists of the Control Box, Motor, Pump/Manifold and Optional Agitator bolted to an Aluminum mounting plate. It will be mounted on the lid of the drum.
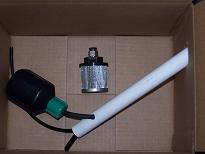
The In-Drum Assembly consists of the float switch, 3/8” intake tube, intake filter, and optional 1/4″ agitation tubing, encased in 3/4″ white PVC tubing. These will be mounted on the underside of the lid, inside the drum.
Here’s how to assemble it in 3 easy steps:
- Place the Above-Drum Assembly on the Drum lid so the pump intake fitting (the 3/8th swivel elbow) is directly over the 3/4″ threaded hole. Next, align the 4 holes in the mounting plate with the 4 holes drilled in the lid and secure the plate with the bolts, washers and nuts provided.
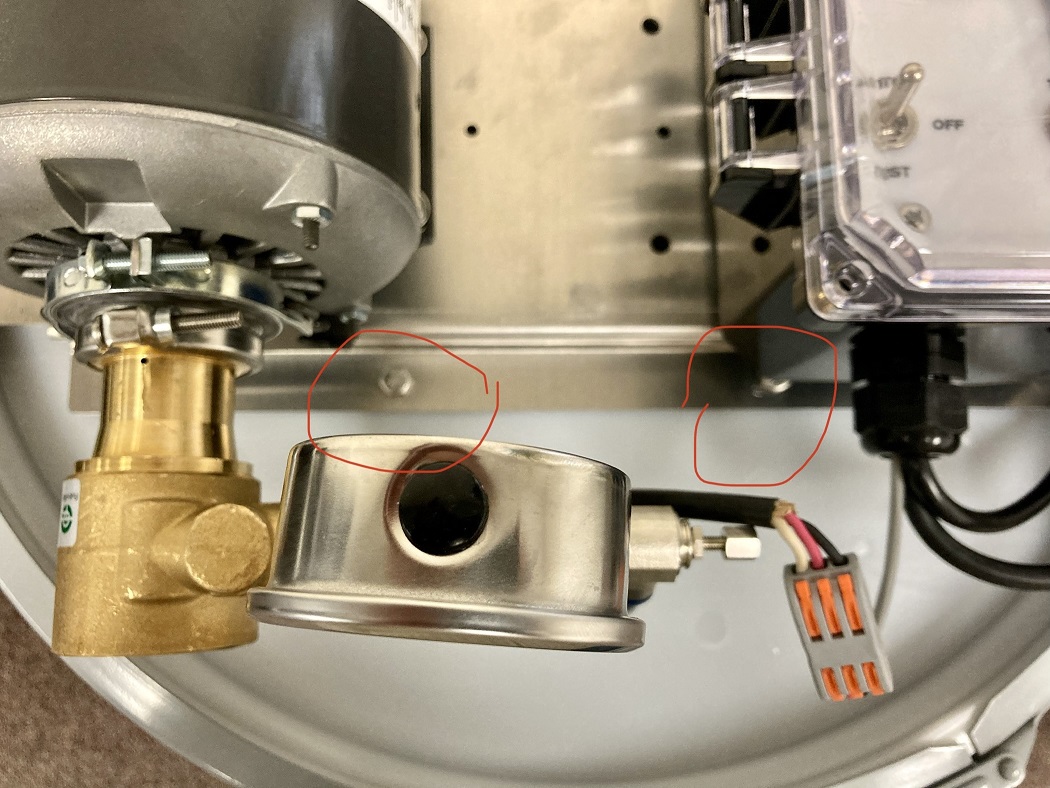
2. Carefully turn over the lid and place the In-Drum Assembly tubing through the 3/4″ threaded hole and screw in the PVC fitting. Attach the filter to the other side of the 3/8″ tubing enclosed in the PVC by firmly pressing until the fitting “seats” into place.
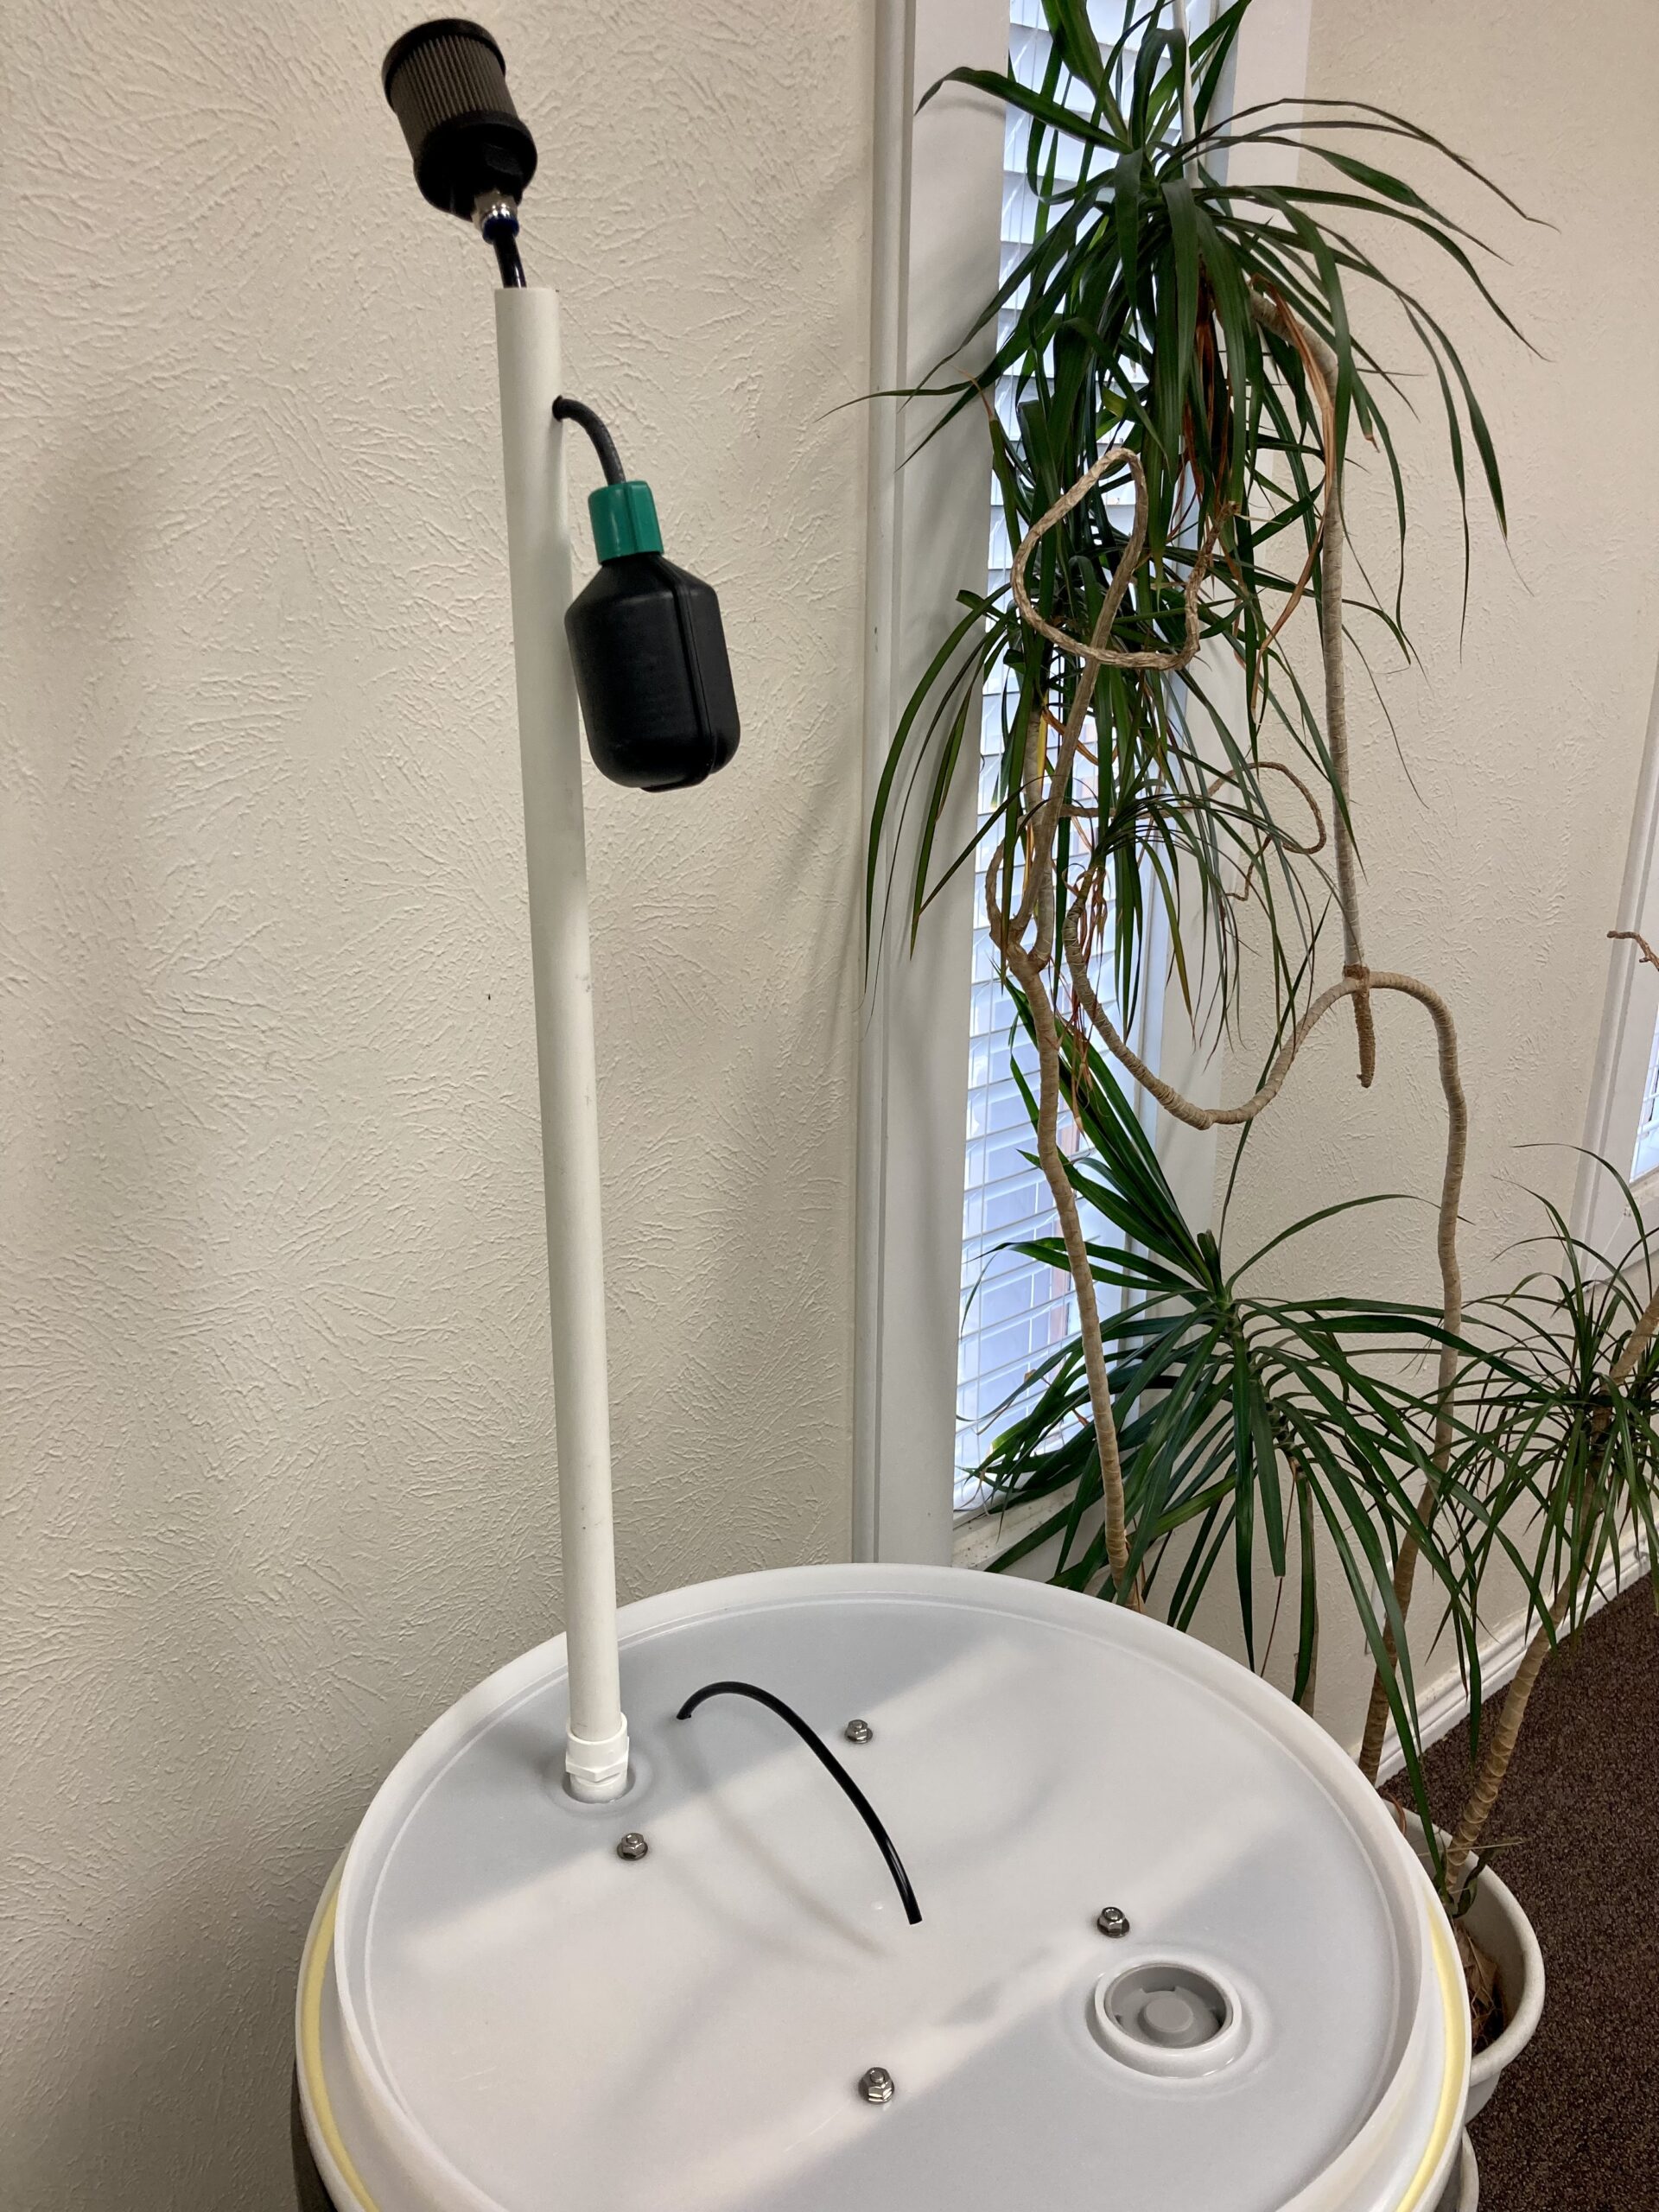
3. Now turn the lid upright and place it on the drum so the In-Drum assembly is inside the drum. Insert the 3/8″ intake tube into the 3/8th intake elbow on the pump until it “seats” into place. Then put the 1/4″ return tube into the pre-drilled hole in the drum. Connect the float switch wires to the grey connector on the control box – lift the three orange tabs on the connector and insert the float switch wires as follows: Black to Black, Red to Red, White to White, push the orange tabs down to secure the wires. If ordered with an agitator, connect the 1/4″ tubing to the agitator’s output.
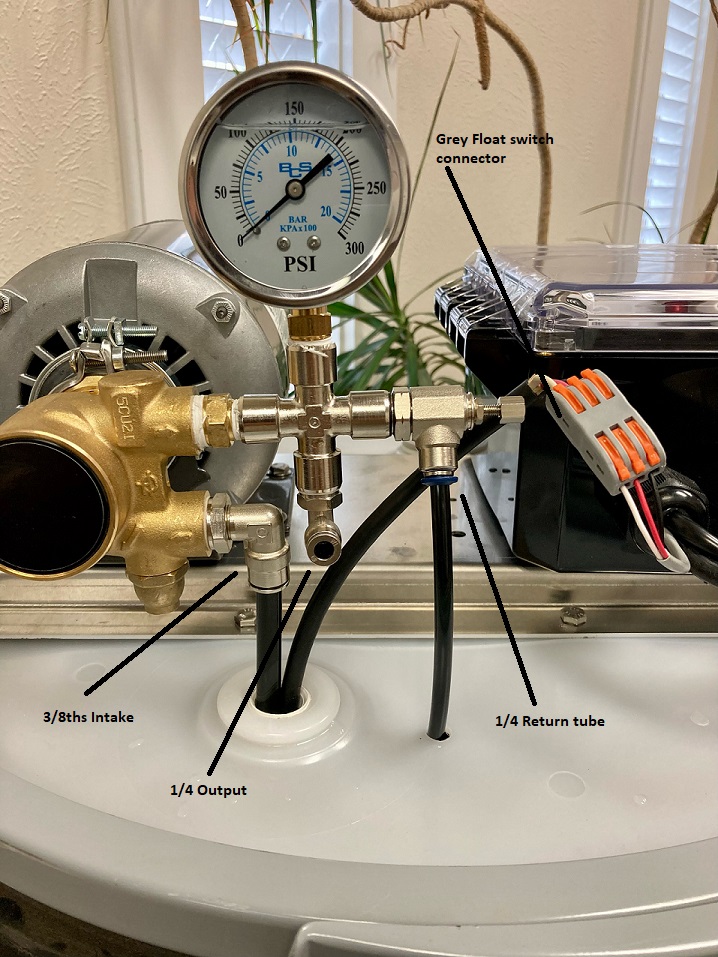
Initial setup: Mount nozzles 8 to 10’ apart, connect unions with tubing ensuring good connections by pressing firmly until tubing “seats” into place. Connect 1/4″ supply line, from nozzle circuit, to the 1/4″ output fill your reservoir about 50% with water only and plug in system. At the control box, turn the Auto/Off/Test switch to Test. Let pressure build and adjust it with the needle valve to 190-200 PSI using the liquid filled pressure gauge. Walk the Nozzle circuit checking for leaks, and spray pattern. Adjust to suit. Note: PSI at or above 250 will cause the pump to go into bypass, nozzles will not spray.
Program Clock: To set clock – Turn the minute hand clockwise until the time of day on the outer dial is aligned with the triangular marker on the inner dial. Clocks initiate spray cycles by passing pulled pins along the clock face. Each pin represents 15 minutes. Clocks are mechanical devices; they contain moving parts that can be damaged by excessive dusk and debris. Please keep the enclosure door closed and use system covers when needed.
Tank Filter Cleaning: Each time you refill the drum with misting concentrate, rinse the filter to remove any excess residue. Replace the tank filter once corrosion and wear is visible on the mesh as a clogged filter can damage the pump and motor assembly. It is recommended to replace the filter once a year.
Winterizing: Winterizing your Mosquito Misting system is required if you live in a climate where the temperature can drop below freezing. First, flush the lines and nozzles with clean water by allowing the pump to run continuously for about 5 minutes. Second, disconnect the output line going to the nozzles. If the Tank is the lowest point in the system the line should drain by gravity. If it is not, find the low spot(s) in the system and disconnect the line and allow it to drain. If you have an air compressor connect it to the output line and remove the furthest nozzle and blow out the water in the line. Finally, remove the intake line, connect a short piece of 1/4″ tubing to the output fitting and place the other end in the tank (This is so any fluid in the pump will be deposited in the tank and not all over you). Run the pump 10-15 seconds to clear any solution that may be in the pump. If your tank is outdoors, replace the protective cover to keep your system clean and dry. If you have prolonged periods of below freezing temperatures, you may want to bring the pump indoors for the winter.
One Year Limited Warranty: Products covered: Misting system products manufactured by Mosquito Control Equipment are covered by this limited warranty: AMS-MM, AMS-MM+20, AMS-S1M, AMS-A, and AMS-D
How long is the warranty? The warranty begins on the date of purchase and lasts for one year.
- What is covered: This Limited Warranty covers any defects in material or workmanship under normal use during the Warranty Period.
- What is not covered:
1) Filters. 2) Damage due to misuse, abuse, neglect, theft, vandalism, unauthorized repairs or attempted repairs, natural disasters, acts of God or terrorism. 3) Damage in shipping to or from the manufacturer. 4) Shipping and packaging of a system returned for a warranty claim. 5) Any special, indirect, exemplary, incidental or consequential damages arising out of or in connection with the product, any other materials or services furnished hereunder, to the greatest extent allowed by applicable law.
